Audio cues
Audio is SMACC’s primary cueing modality. The Audio cue window (in the Panels column) holds the cue board: one row per cue, each ready to fire with a single click.
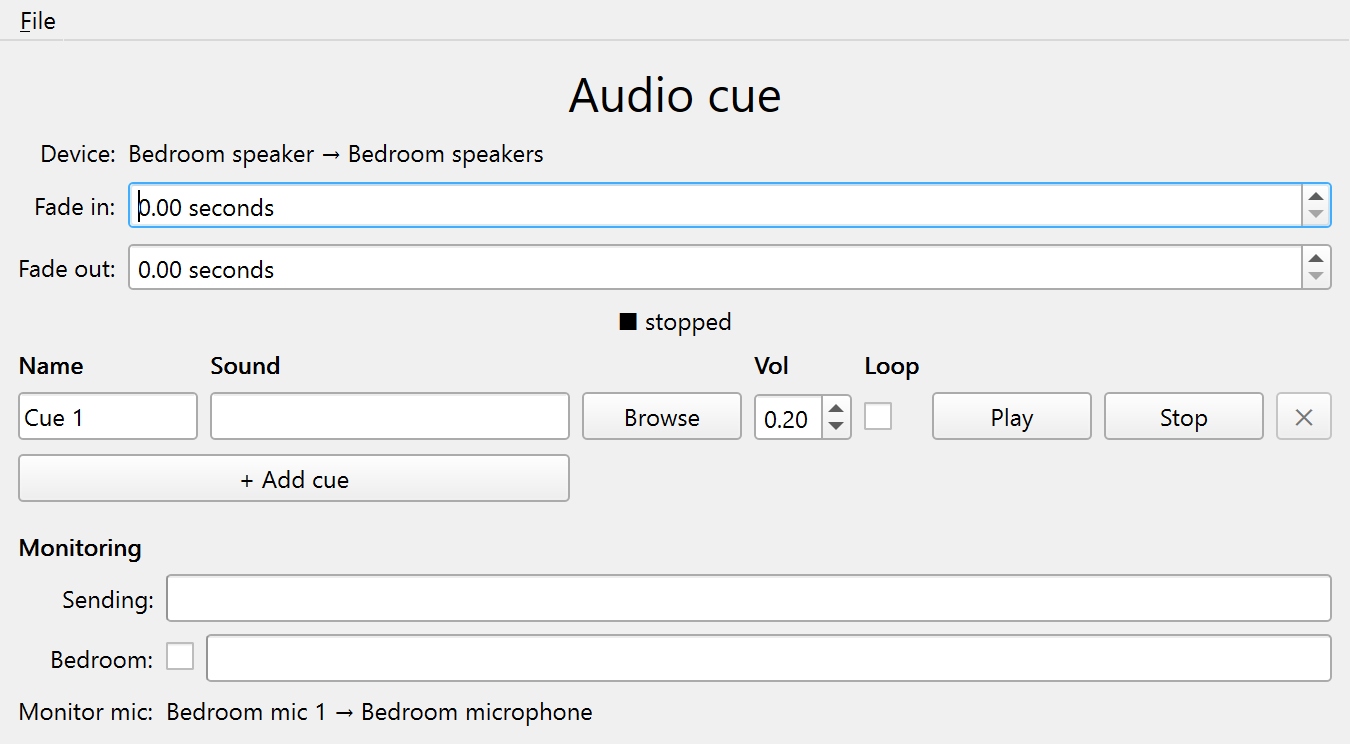
The cue board
Place sound files where your settings expect them — by default the data directory’s cues/ folder (for example ~/SMACC/data/cues/; common formats such as .wav, .mp3, .flac, .ogg, and .aiff are accepted) — and trigger them from the cue controls. SMACC seeds a few demo-* cues there so there is always something to test with. You start with one cue, prefilled with a random demo, and use + Add cue and each row’s ✕ to match a protocol (one minimum, up to 20).
Each play and stop is marked in the EEG record. The cue marker is stamped at the estimated sound onset, not the button press, so it lines up with what the participant hears (see Volume & latency).
Designing a cue
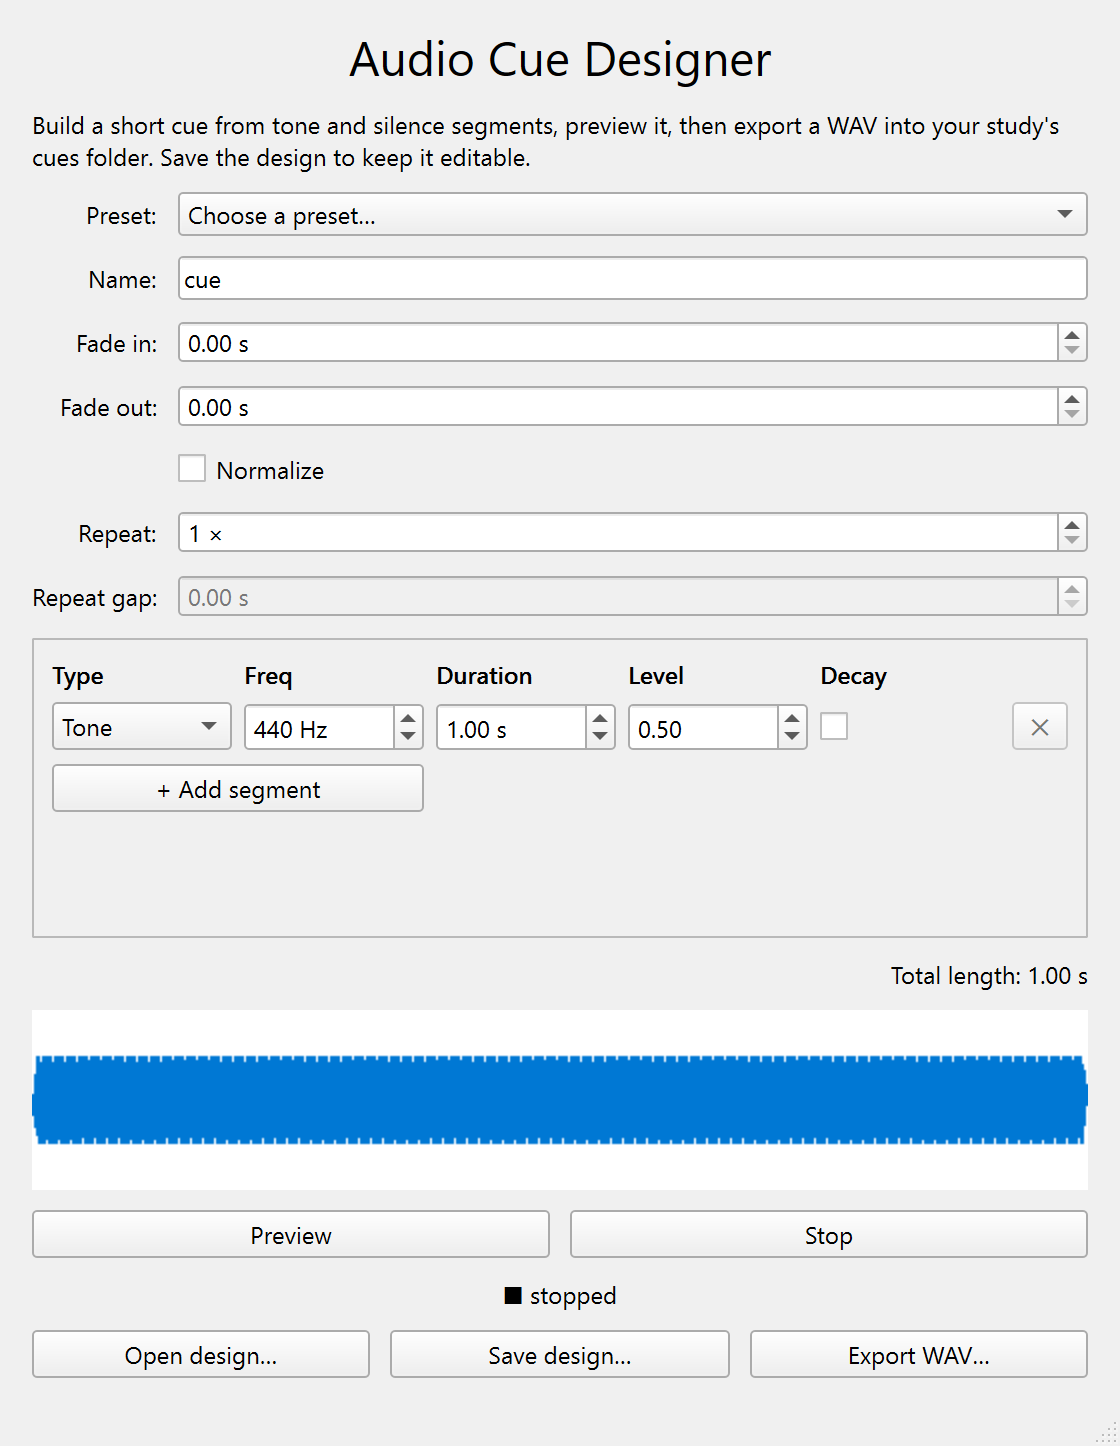
No sound file ready? Open the Audio Cue Designer from the Launcher to build a simple cue inside SMACC, with no external audio editor. Lay out a sequence of tone and silence segments (each tone has a frequency, duration, and level, with an optional bell-like decay), or start from a preset (a single chime, a pip train). The whole pattern can repeat (×N with a gap between repeats, the classic pip-train shape), and an optional whole-cue fade in/out and normalize finish it. A live waveform shows the cue as you edit, Preview plays it on your default output, and Export WAV… writes it into your study’s cues/ folder, where it appears in the cue board like any other cue.
The WAV is what the cue board plays; the design stays editable through Save design… / Open design… (a small .json file, kept alongside the WAVs by default), so you can reopen it tomorrow and nudge a level instead of rebuilding the cue. The designer is a standalone tool: it plays on the default device and ignores the session’s device routing and volume safety cap.
Background noise
The Noise machine window plays continuous masking noise on the cue route. Pick a color (white and the other generated colours) or point it at your own WAV (the From file option), set its volume, and start it. Noise started (62) and Noise stopped (63) mark the EEG. Noise shares the bedroom-speaker route and the output safety cap with cues, so calibrate it the same way.
Is the cue reaching the bedroom?
A cue you can hear in the control room is not proof the participant heard it: the bedroom speaker could be muted, unplugged, or turned down at the hardware. The Audio cue window’s Monitoring section shows two meters so you can tell:
- Sending is the level SMACC is emitting to the cue output, the moment it plays. It is exact, but it only confirms SMACC is playing; it is blind to everything downstream (Windows volume, the speaker’s power switch, the cable). Read it as a diagnostic: if Sending is dark, the problem is on SMACC’s side (wrong cue, or a per-cue volume or the safety cap at zero); if it is lit but the room is silent, the problem is the speaker.
- Bedroom is the level a microphone actually picks up in the room. This is the objective check: it moves only when sound really happens in the bedroom. Tick the box beside it to start monitoring. Because a faint cue can sit close to a cheap mic’s noise floor, the meter also shows the rise above the room’s resting level (the
+Nnext to the reading), so even a small bump stands out.
The Bedroom meter listens on the Monitor bedroom noise route, which defaults to Bedroom mic 1. For the most reliable check — especially for the very quiet cues a study often starts at — bind a separate, sensitive Bedroom mic 2 in the Devices window and route Monitor bedroom noise to it. That keeps verification independent of the (often cheaper, voice-activated) dream-report mic.
A cheap or voice-activated mic may not register a very faint cue even when it is playing, so a dark Bedroom meter is a prompt to check, not proof the cue failed. Read it together with Sending.
For how cue levels combine and how to calibrate them, see Volume & latency. For binding the speaker and mics, see Audio routing.